Cesium for Unity 官方教程
Cesium for Unity Quickstart
This is a quickstart guide to building a Cesium for Unity app with Cesium World Terrain and Cesium OSM Buildings.

You’ll learn how to:
Import the Cesium for Unity package into Unity
Create a level and import assets from Cesium ion
Set your project's default ion asset token
Navigate your scene with Cesium's DynamicCamera
Prerequisites
An installed version of Unity 2021.3.2f1 or later. The latest version of?Unity 2021.3+ LTS?is recommended. For instructions on installing Unity, visit the?Unity download page?and refer to the?Installing Unity guide.
A Cesium ion account to stream terrain and building assets into Unity.?Sign up?for a free Cesium ion account if you don’t already have one.
Cesium ion is an open platform for streaming and hosting 3D content, and includes global, curated data that you can use to create your own real-world applications.
Step1:Create a new project and import the Cesium For Unity package
1. Create a new Unity project. Unity recommends creating projects with the Unity Hub, which you can download?here. This tutorial was written with Unity Hub 3.3.0.
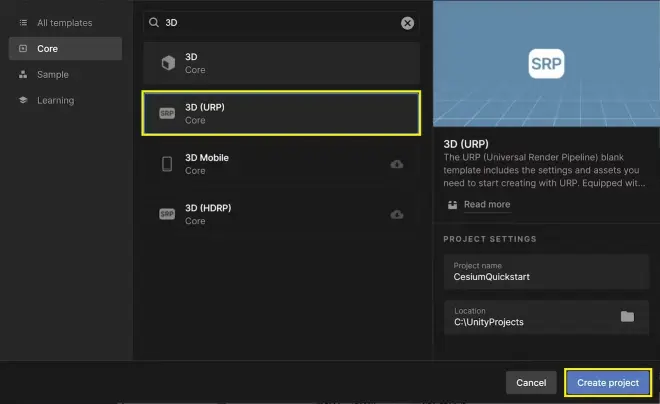
Create a new project from the?Projects?tab by clicking the?New project?button.
A new window should open, allowing you to configure your project. This tutorial uses the?3D (URP)?template, but the?3D (HDRP)?template will also work. Give your project a name and choose its file location. Then, press?Create project. Your new project will open momentarily.
2. Once the project has fully loaded, open the?Project Settings?by going to?Edit > Project Settings...?in the menu.
3. Click the?Package Manager?section on the left.
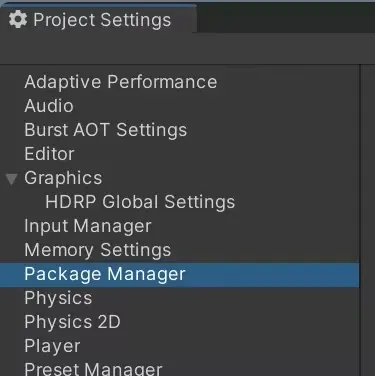
4. Add a new?Scoped Registry?with the following settings and click?Save:
Name:?Cesium
URL:?https://unity.pkg.cesium.com
Scope(s):?com.cesium.unity

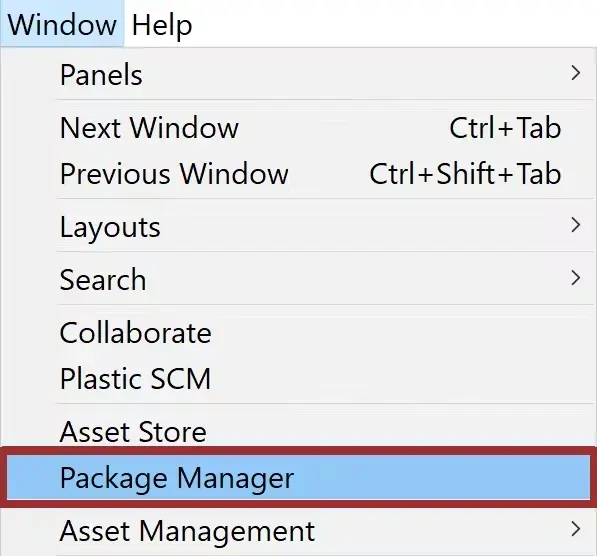
5. Close the project settings and then open the?Package Manager?by going to?Window > Package Manager?in the menu.
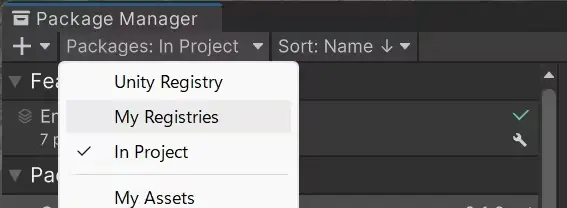
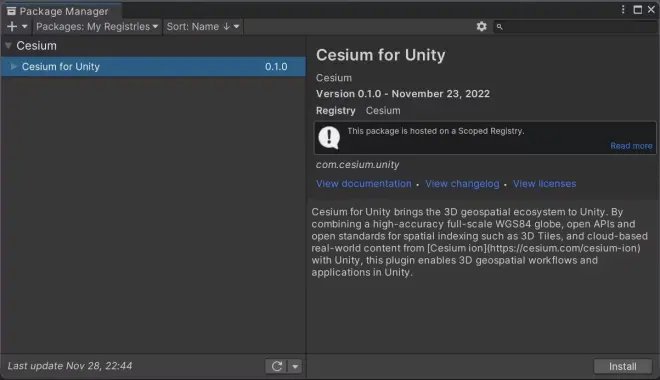
6. In the Package Manager, click on the?Packages?drop-down and select?My Registries.
7.?Cesium for Unity?will appear in the package list. Click on it, and then click?Install. Cesium for Unity and its dependencies will be downloaded and installed.
Step2:Connect to Cesium ion
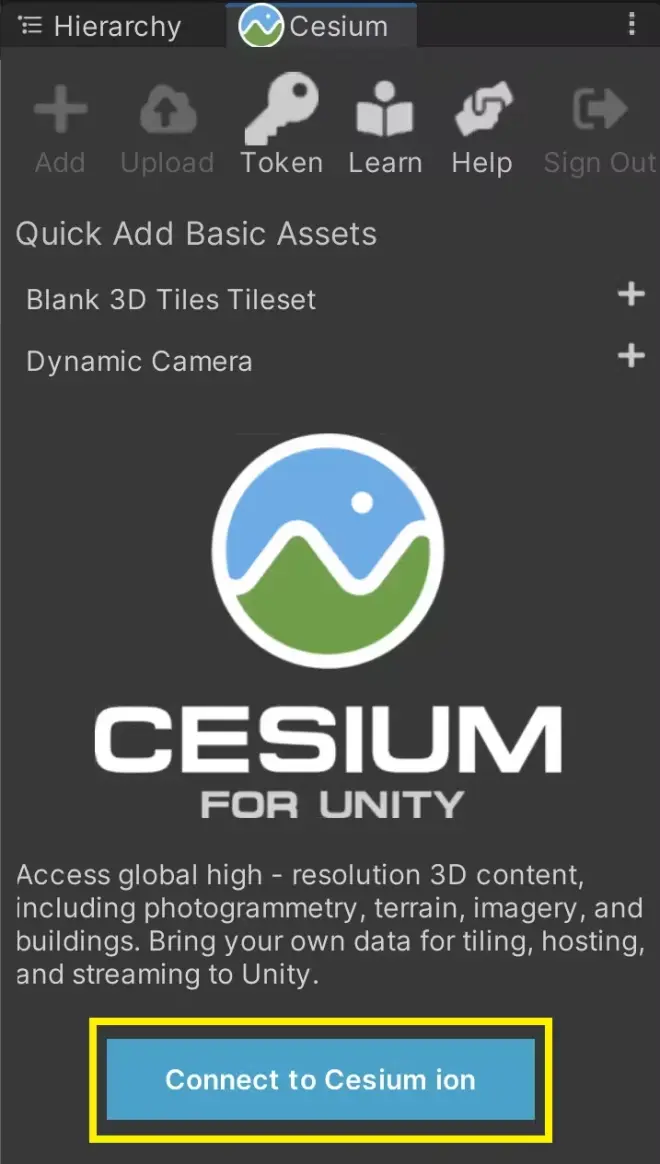
1. Open the?Cesium?window by selecting?Cesium > Cesium?from the menu.

2. Click the?Connect to Cesium ion?button.
3. A pop-up browser window will open. If you are not logged in, log in to your Cesium ion account. You can also sign in with your Epic Games, Github, or Google account.
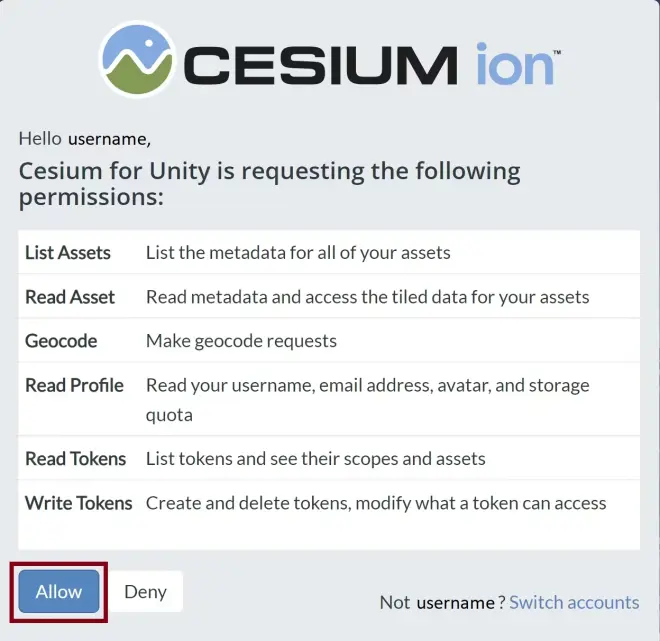
4. Once you are logged in, you'll see a prompt asking you to allow Cesium for Unity to access your assets. Select?Allow, then return to Unity to continue.
5. Now you'll create a?default access token?for your project. Every asset that you stream from Cesium ion requires an access token. In this tutorial, you'll set a project-wide access token that all your assets will use.
Click on the?Token?button at the top of the?Cesium?window.

6. A new window will appear to configure the token. Select the?Create a new token?option, and rename the token if you wish. Then, press the?Create New Project Default Token?button.
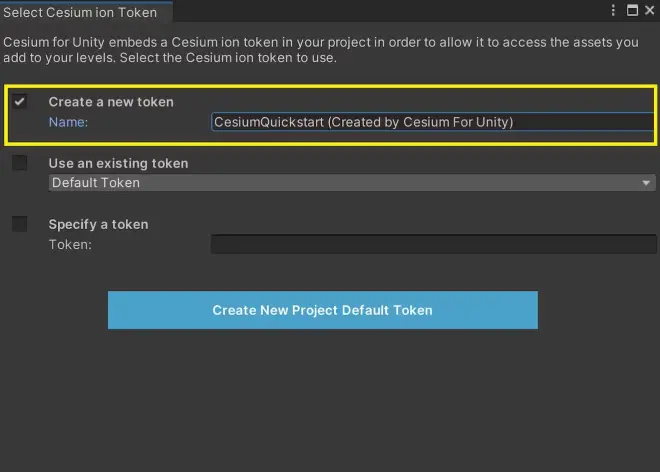
The new token you created will be added to your Cesium ion account.
If you already have a token in your Cesium ion account that you would like to use, you can select it from the "Use an existing token" drop-down instead of creating a new one.
Tokens created by Cesium for Unity access only the assets that you allow. This follows security best practices for your Cesium ion account. Whenever you use the?Cesium?panel or?Cesium ion Assets?panel to add an asset to your scene, Cesium for Unity will automatically update the appropriate permission for the token.
You may choose to manually configure your token and add or remove assets using the?Access Tokens page on Cesium ion.
Step3:Add a globe to your scene
Unity creates a new?SampleScene?whenever you create a new project. Feel free to rename your scene. Verify that it contains a?Main Camera?and a?Directional Light?in the?Hierarchy?window.
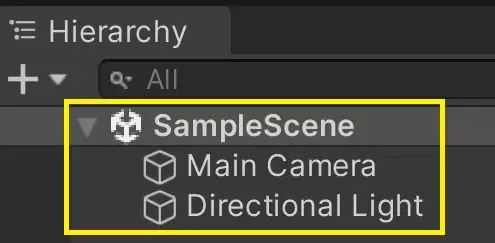
If either of these objects is missing, you can add it from the menu by clicking?GameObject > Camera?or?GameObject > Light > Directional Light,?respectively. You may have additional objects in your scene depending on which render pipeline you chose, which is fine.
With these basic objects in your scene, you are ready to add an asset from Cesium ion.
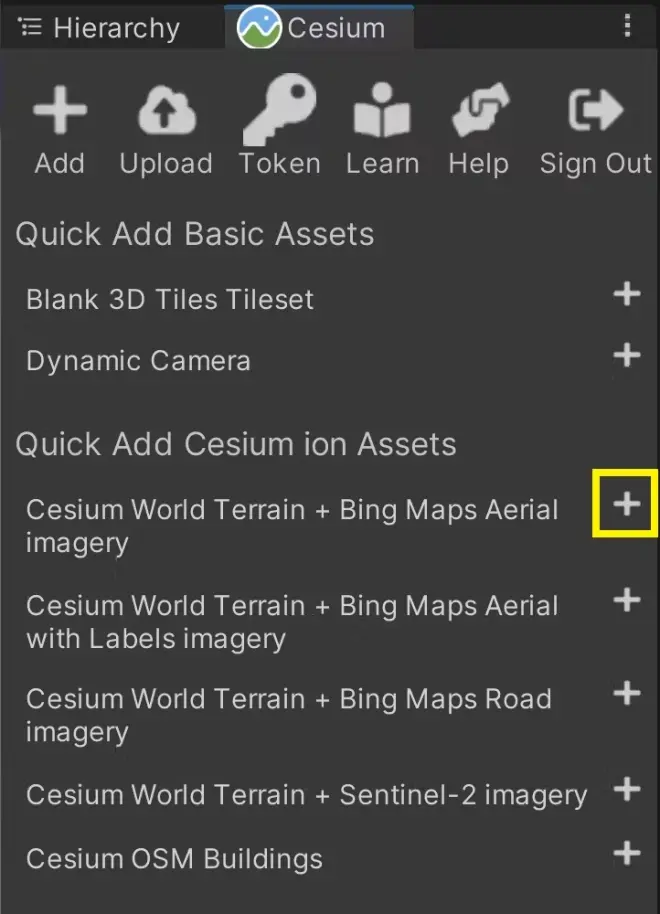
1. From the?Cesium?window, add "Cesium World Terrain + Bing Maps Aerial imagery" by clicking the button next to that entry.
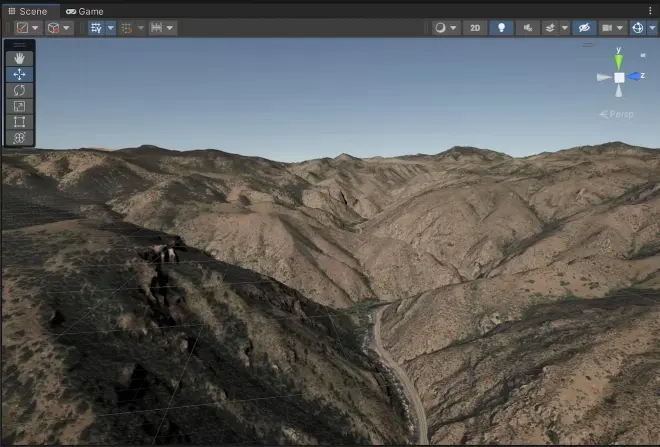
Terrain will start to appear in the scene.
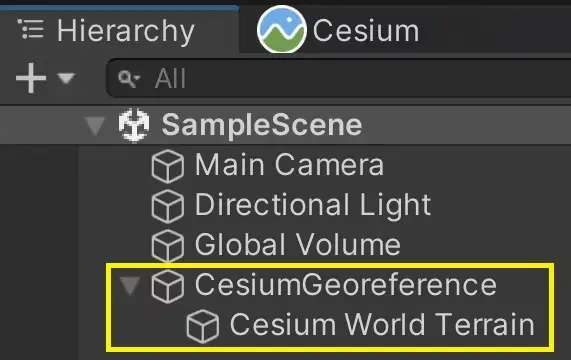
2. Take a look at the?Hierarchy?window. You should see two new game objects. One of them,?Cesium World Terrain, is the tileset you just created. The parent of the tileset,?CesiumGeoreference, is created automatically the first time you add a 3D Tileset to the scene.
3. If Cesium World Terrain is not already selected, select it now. In the?Inspector?window, you'll see more information about this game object.
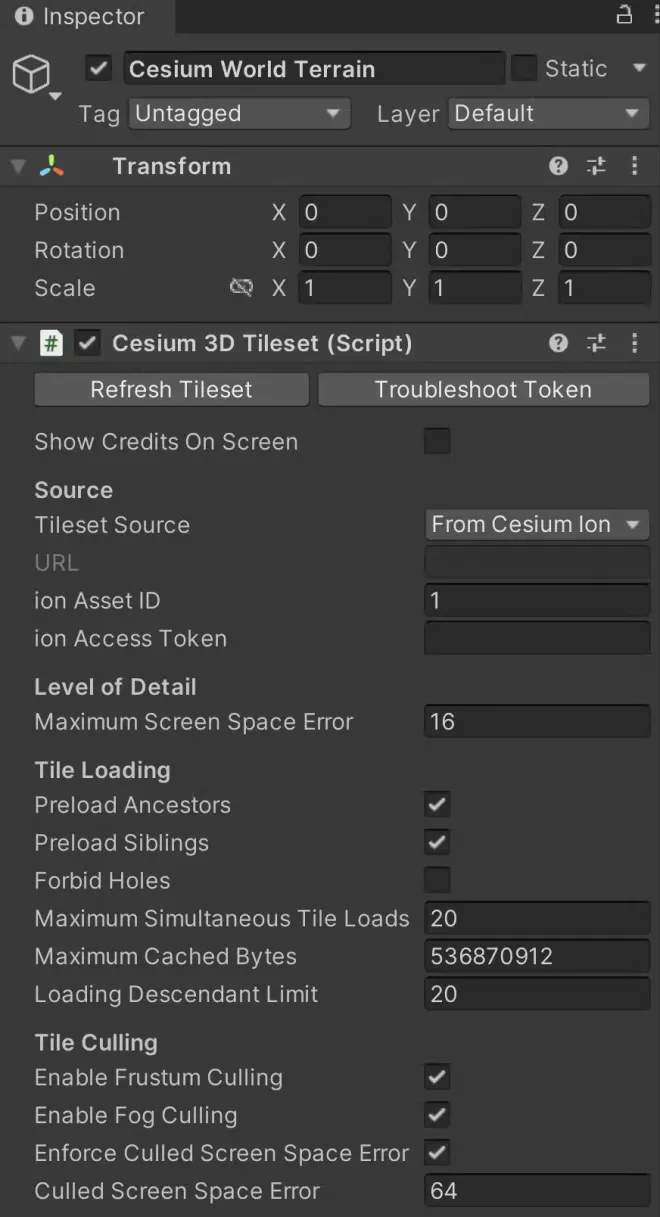
This is a?Cesium3DTileset?component. When attached to a game object, it streams 3D Tiles data into Unity and provides ways to configure that tileset.
You'll learn about many of the available settings in future tutorials. For now, feel free to explore and try out the different settings yourself. Hover over any setting with your mouse to learn more about what it does.
Once you're ready, continue to the next section.
Step4:Configure the Main Camera
In your scene, you should have a game object named?Main Camera?with a?Camera?component attached. If you added a camera to the level yourself, it may be called?Camera?instead. This camera will capture your scene during Play Mode. You can preview this by clicking the?Game?tab.

You may notice that the terrain on the horizon is strangely cut off. This clipping can also happen in the?Scene?view while moving the Editor camera around, though it is usually less obvious.
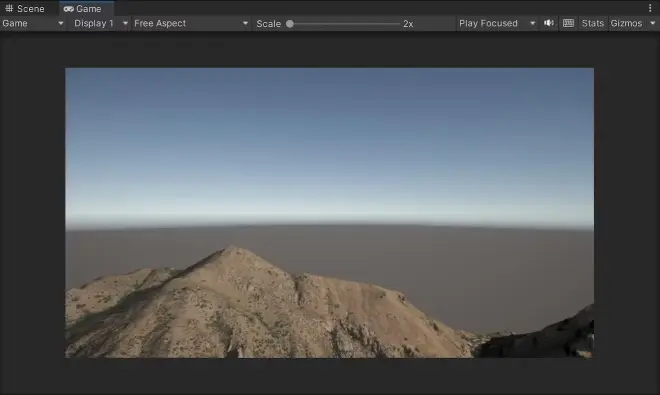
This happens because cameras in Unity can only see a limited range in front of them. If you view your camera from the?Scene?view, you can see its range visualized as a?frustum, like below.
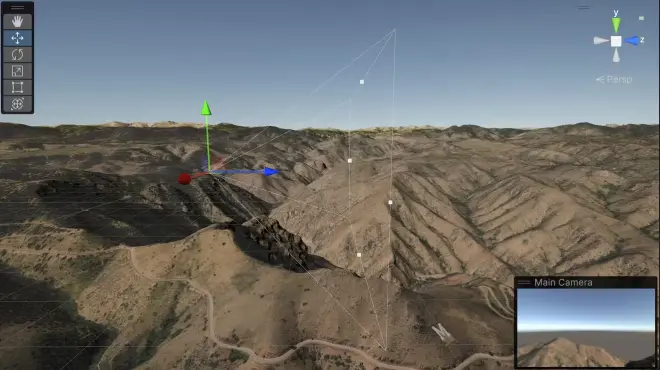
The start and end of the camera’s frustum are defined by the?clipping planes.?These represent the distances from the camera at which objects will show up. It is clear that the camera cannot see very far in the distance.
Cesium World Terrain is a full-scale globe, so Unity is rendering terrain that spans?hundreds?of thousands of miles, just from this camera view! However, Unity’s cameras are not configured to see objects this far by default. Fortunately, you can manually adjust the clipping planes so the camera can properly view the scene in Play Mode.
1. Select your camera from the?Hierarchy?window, and go to the?Camera?settings in the?Inspector. Find the values of the?Clipping Planes.
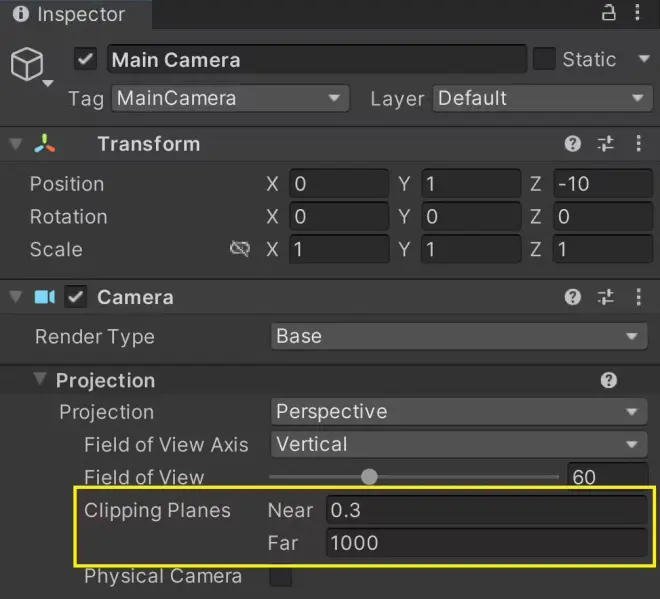
The?Near?clipping plane is the minimum distance from the camera where objects start to appear. If this is a large value, objects close to the camera will not show up. On the other hand, the?Far?clipping plane is the maximum distance from the camera that objects will appear. Anything farther than the Far plane will not appear.
It is clear that the camera cannot see very far in the distance. However, this can be easily changed in the?Camera?component.
2. Set the?Near?value to 1 and the?Far?value to a large value, at least 100,000. This will significantly extend the sight of the camera and prevent the terrain from being clipped in-game.
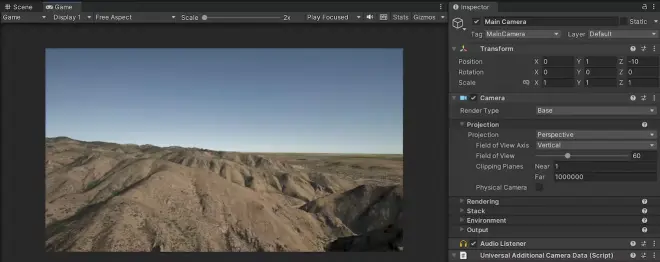
In your own applications, these values can change depending on your use cases. For example, you can set the Near plane to a larger value if you plan to show data only from far away. Try not to let the Far plane get too far away from the Near plane, or you may run into rendering issues. See the?Unity documentation?for the Camera component for more details.
Now that your camera can see more of the scene, feel free to position the camera to get the best view of the terrain. You can use the?Move?and?Rotate?tools in the?Scene?view to move the camera to the perfect spot. You can also switch to these tools by pressing the?W?and?E?keys on your keyboard respectively.


